Getting Started with S32 Design Studio Part 3
Objective of This blog
- Understanding the code: Talk about different views.
- IDE Properties and Configurations
- Building & debugging the code: Debug configurations and how to use
Understanding the Code
Now after code configuration, our code will be generated. We can see the project files/folder in Project Explorer and write/modify/develop the c/cpp code on the code editor. As shown below. Now it’s time to explore the features S32 Design Studio provides for code navigation and development.

Now in this section, I am going to talk about different features/views present in S32 Design Studio for Embedded Code navigation/development.
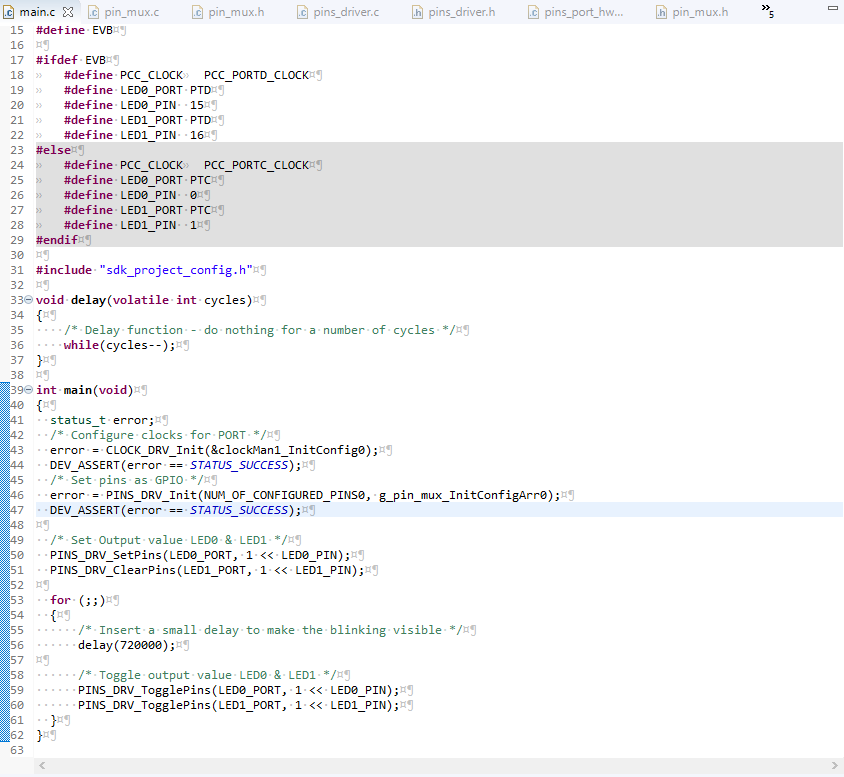
Text Editor view: This is the main view, onto which programming is done. Double clicking on any file from Project Explorer will open the open in text editor.
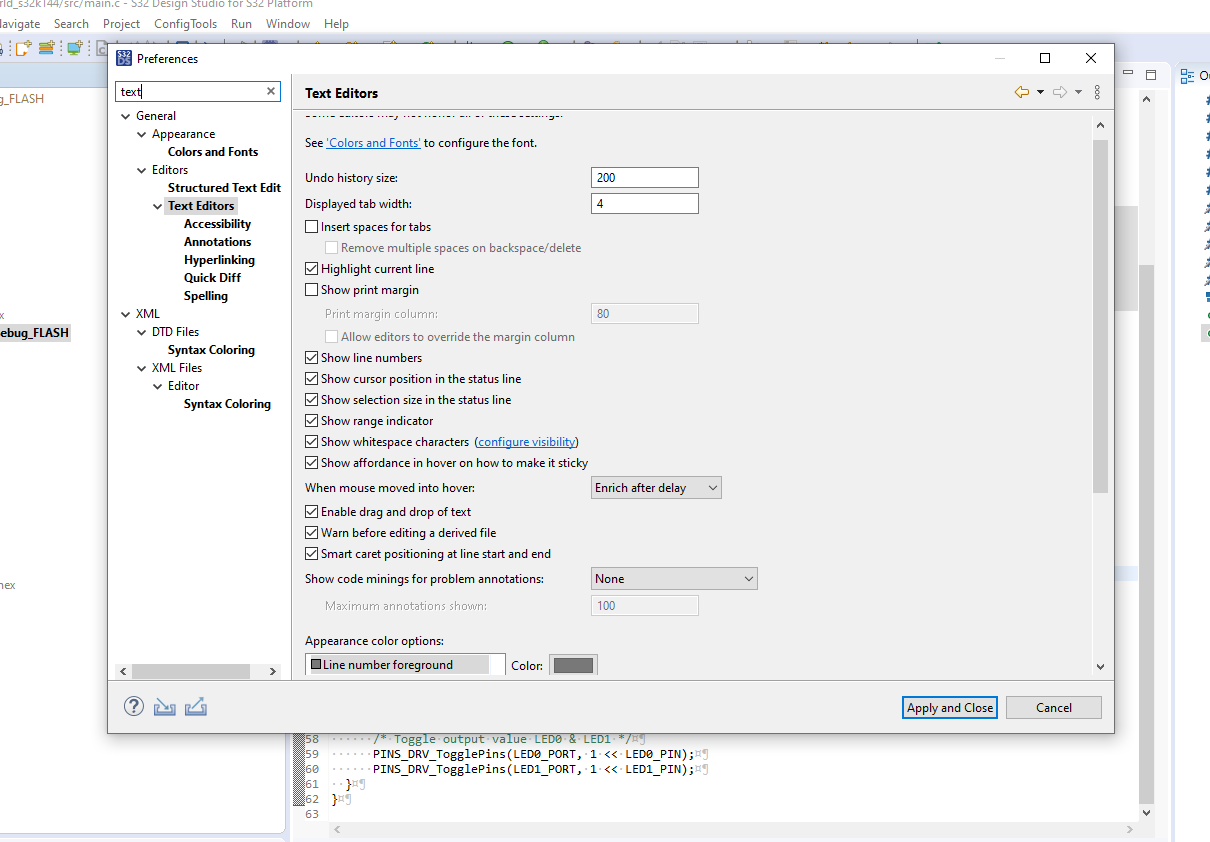
 We can configure the Text Editor by going to Window->Preferences. We can configure Text editor features like Line number, White space characters, Text Editor Colors. It’s good to explore such features to make the development process on S32 DS interesting.
Outline view: This is one of the best and most useful view. The  Outline view displays an outline of a structured C/C++ file that is currently open in the editor area, by listing the structural elements.
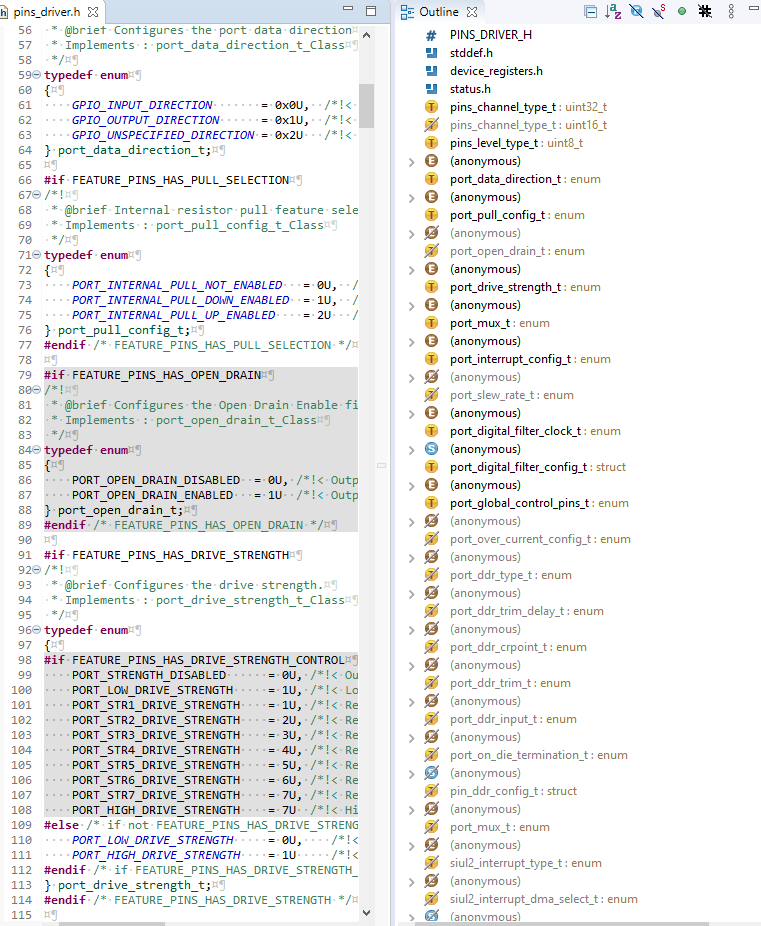 As you can see, this view makes very easy for navigation in the corresponding .c/.h file.
Console: Console is the place where we can see the Verbos of the compilation process of our project. During compilation process. all the errors and warnings are listed in console window. 
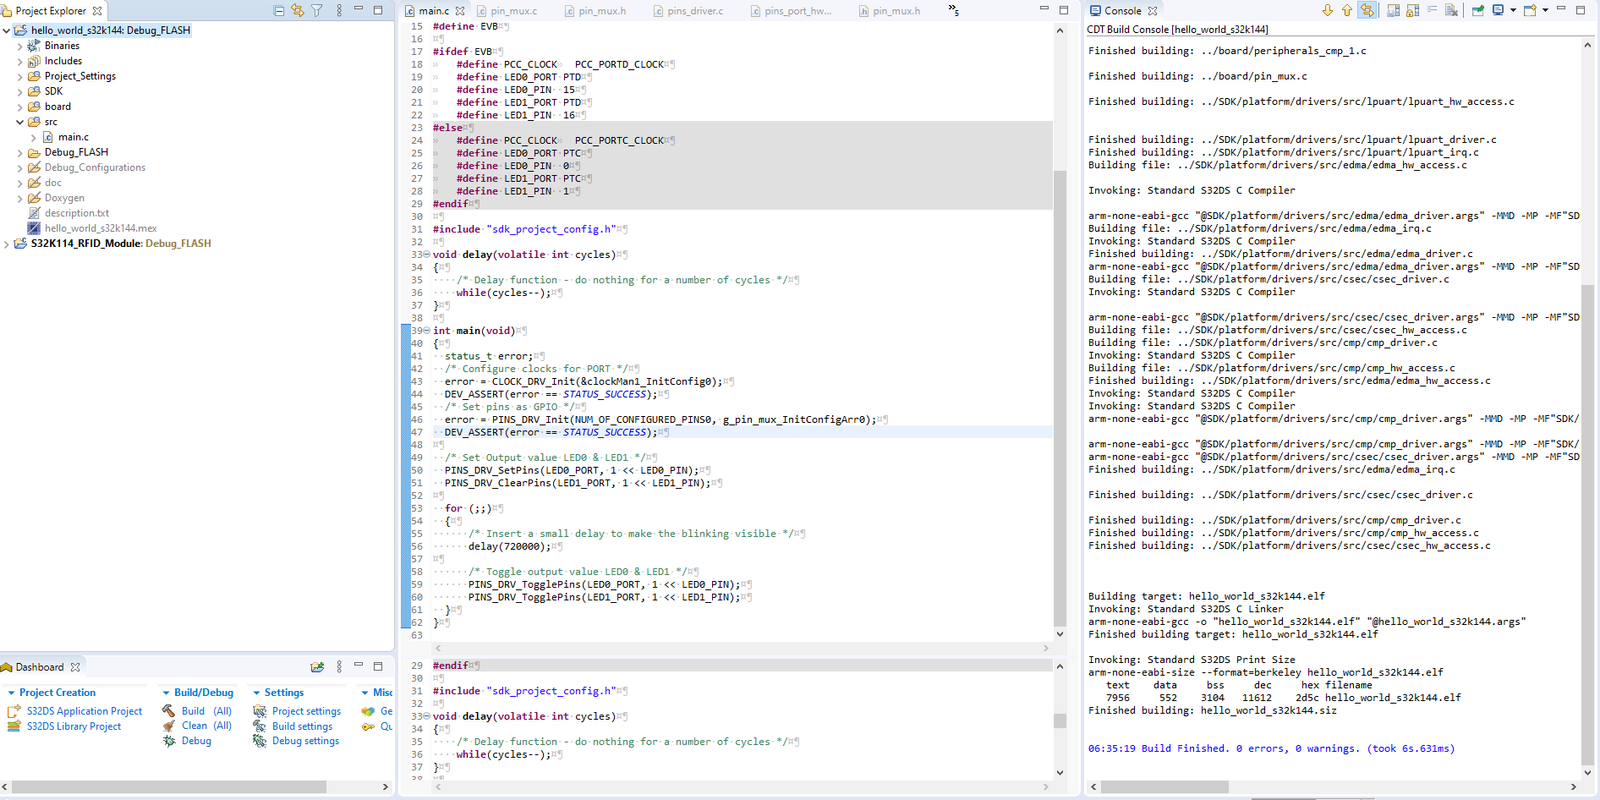
Project Explorer: Project Explorer view is the one where we can see our project, when it is created or opened. One can see the proper folder structure and files which are their in our project.
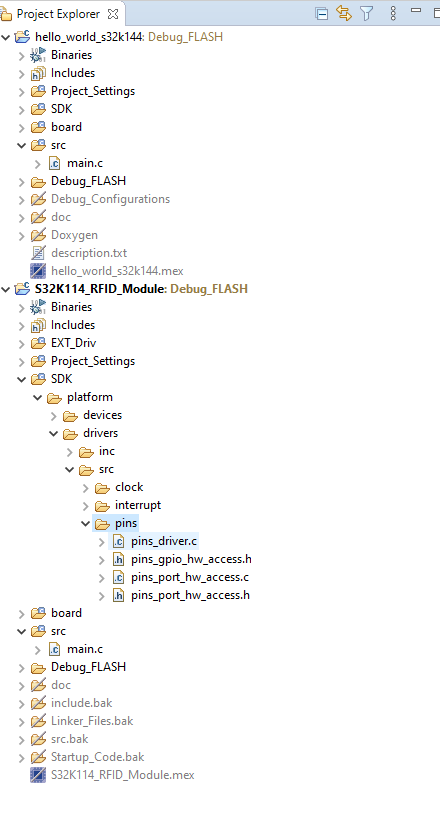
By left clicking, on the project in Project Explorer, we can configure our project.
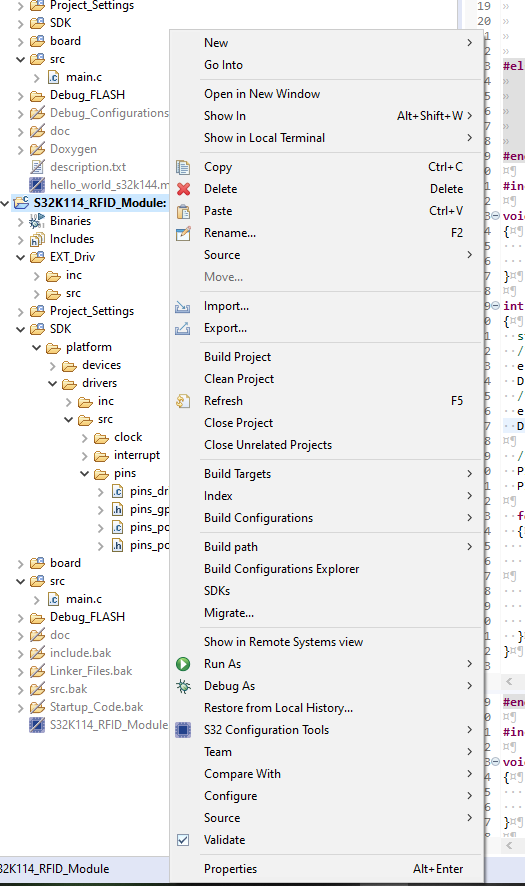
We can configure the project in terms of New File/Folder Creations in our project, Build Configurations and SDK management of our project.
One of the most important options in this list is Properties, where we can configure Project setting of our project. I leave this section to explore on own, if you face any issue or want to know things mention them in below comment section.
Search: Often during the course of Embedded Software development, we would be dealing with the large Project’s in which there are 1000’s of lines of code written in single file and 100’s of files are there. So, in that case using the search view makes things easy to locate.
IDE Properties and Configurations
- Window-> Editor
- Window ->Preferences
- Help -> S32 DS Extensiona nd Updates
- Help -> S32 Check for Updates
- Help -> Install New Software
- Help -> Help Contents
How to Build the Code in S32 Design Studio IDE
Debugging tools supported in S32 Studio
Different types of hardware debuggers in s32 design studio. there are two types of hardware debugger in S32 design studio which is supported by the S32 design studio
- SEGGER J-LINK debugger
- SWD based PEMicro debugger
The J-Link Debugger is a popular hardware debugger and programmer developed by SEGGER Microcontroller, a company specializing in embedded systems and software tools. J-Link is widely used in the embedded development industry and provides a range of debugging and programming capabilities for various microcontroller architectures and development environments.
GDB PEmicro is a debugger interface that allows the GNU Debugger (GDB) to communicate with P&E Microcomputer Systems’ hardware debuggers and programmers. It enables developers to use the GDB debugger, a powerful and widely used open-source debugging tool, in conjunction with P&E Micro hardware to debug and program microcontrollers and embedded systems.
Here’s how GDB PEmicro works and its key components:
- GNU Debugger (GDB): GDB is a widely used and versatile debugger for various programming languages and platforms. It provides features such as setting breakpoints, examining and modifying memory and registers, stepping through code, and more. GDB is commonly used in embedded systems development.
- P&E Micro Hardware Debuggers: P&E Microcomputer Systems produces a range of hardware debuggers and programmers designed for embedded systems development. These debuggers, such as the Multilink and Multilink FX, are used to connect a host computer to a target microcontroller for debugging and programming purposes.
- GDB PEmicro Interface: GDB PEmicro is essentially an interface or server that bridges the communication between the GDB debugger and the P&E Micro hardware debugger. It allows GDB to control and interact with the P&E Micro hardware as if it were a native GDB-supported debugging interface.
- Ware
How to Debug the code in S32 Design Studo IDE
First step:- on the project explorer select the project name and right-click on it scroll down and find debug as an option.fig is shown in below.
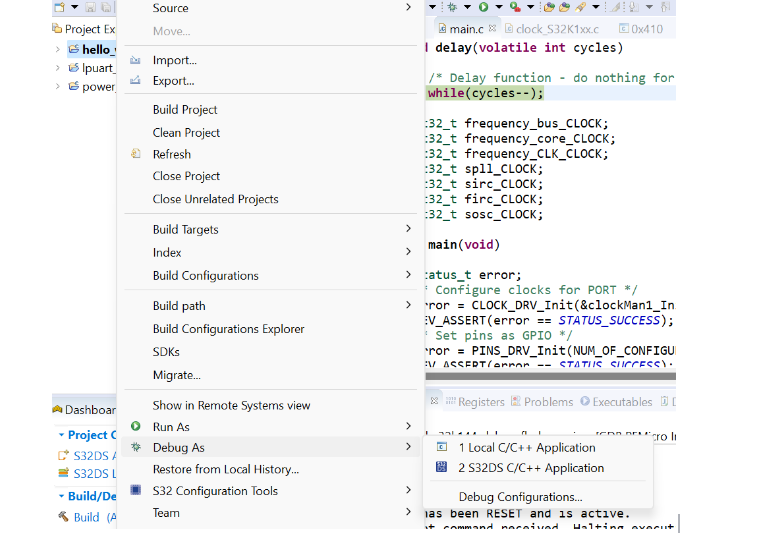
After clicking on debug and then clicking on debug configuration a popup page is open as shown in the fig below.
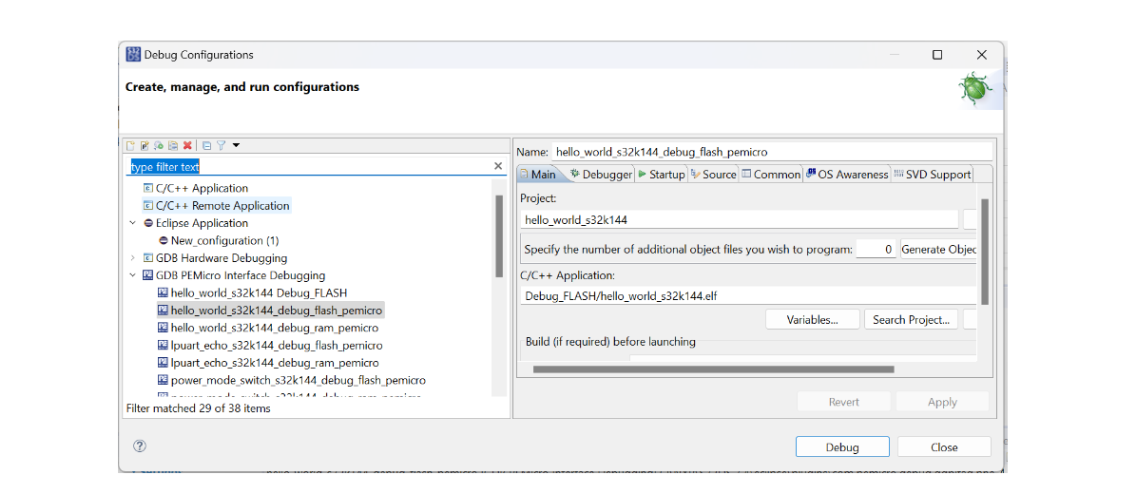
Now, select the debugging interface in this case i am using the in circuit debugger that is GDB PEMicro interface debugging in that select the memory option where you want to upload the code in microcontroller board in my case i am using flash memory reason of choosing the flash memory because it is volatile memory means when the power is off then the code that is uploaded in the microcontroller that is still in the memory but in case of ram when the power is off the code is in the microcontroller is gone.
After choosing the configuration then click on debug.then a debug option is just inside of your project explorer and you can see the debugging part is done.When using the graphical interface, the developer is switched to the Debug or VDK Debug perspective that includes customizable views for inspecting values and managing the debugging process. The views available to the developer are Memory, Registers, EmbSys Registers, Breakpoints, Expressions, Variables, and other. The information about the debugging status appears in the Console, Debugger Console, and Problems views. The debug sessions with the included processes and threads can be managed in the Debug view.
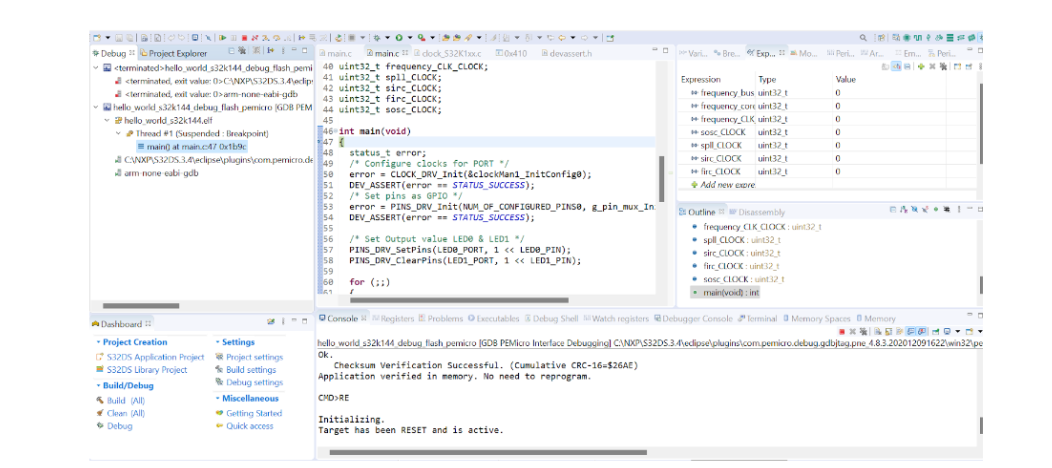
In the console you can see that the target is selected and after debug it is in rest mode but still in active mode.
If specified in the debug configuration, the debug session halts at the first breakpoint, that is main. The user releases the program execution and starts stepping through the code.
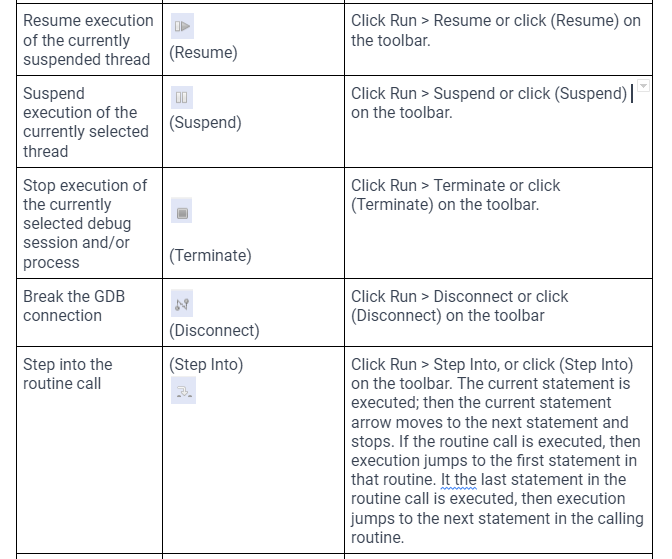
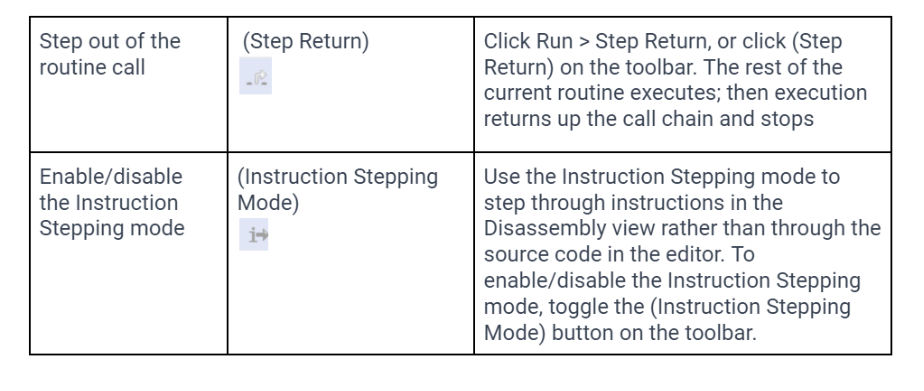
During debugging, the user can set breakpoints, inspect and edit memory registers and peripheral registers, create variables and expressions, debug the source code or step through instructions.
Serverals views that can helps in the time of debugging the code :-

Also there are some options that can help in the time of debugging the code :-


Author


